学习verilator-笔记1

笔记1所包括的范围

verilator安装

我的电脑是Linux Ubuntu 24.04.1 LTS (vmware虚拟机x86) 和 Linux UnionTech OS Desktop 20 Pro(真实机器aarch64)
安装方法有两种:
第一种是直接使用apt进行安装
apt-get install verilator
第二种是通过编译的方式(我采用这种方法)
根据ysyx的手册,我们安装v5.008版本

1
2
3
4
5
6
7
8
9
10
11
12
13
14
15
16
17
18
19
20
21
22
23
24
前提条件,需要预先安装一些包用于编译:
#sudo apt-get install git help2man perl python3 make autoconf g++ flex bison ccache
#sudo apt-get install libgoogle-perftools-dev numactl perl-doc
#sudo apt-get install libfl2 # Ubuntu only (ignore if gives error)
#sudo apt-get install libfl-dev # Ubuntu only (ignore if gives error)
#sudo apt-get install zlibc zlib1g zlib1g-dev # Ubuntu only (ignore if gives error)

git clone https://github.com/verilator/verilator # Only first time

# Every time you need to build:
unsetenv VERILATOR_ROOT # For csh; ignore error if on bash
unset VERILATOR_ROOT # For bash
cd verilator
git pull # Make sure git repository is up-to-date
git tag # See what versions exist
# 这里的版本与 文档保持一致,v5.008
git checkout v{version} # Switch to specified release version

![v5.008](https://telegraph-image-cnr.pages.dev/api/rfile/verilator1-1.png)

autoconf # Create ./configure script
./configure # Configure and create Makefile
make -j `nproc` # Build Verilator itself (if error, try just 'make')
sudo make install

systemc安装

官方安装步骤

我自己的安装步骤:

  1. 下载systemc并解压
    1
    2
    3
    4
    5
    6
     tar -xzvf systemc-3.0.1.tar.gz
    2. 进入systemc目录并创建临时目录objdir
    ```bash
    cd systemc-3.0.1
    mkdir objdir
    cd objdir
  2. 配置
    1
    2
    3
    4
    5
      ../configure
    or
    ../configure 'CXXFLAGS=-std=c++17'
    or
    ../configure --prefix=/usr/local/systemc-3.0.0
  3. 编译
    1
    make
  4. 编译和运行子文件夹中的案例
    1
    make check
    ![Testsuite summary for SystemC 3.0.0](https://telegraph-image-cnr.pages.dev/api/rfile/verilator1-2.png)
    ![Testsuite summary for TLM 2.0.6](https://telegraph-image-cnr.pages.dev/api/rfile/verilator1-3.png)
    
  5. 安装
    1
    make install
    7. 添加环境变量
    
    1
    2
    3
    4
    echo "# SystemC Install path" >> ~/.bashrc
    echo "export SYSTEMC_HOME=$HOME/Program/systemc-3.0.1" >> ~/.bashrc
    echo "export SYSTEMC_INCLUDE=$SYSTEMC_HOME/include" >> ~/.bashrc
    echo "export SYSTEMC_LIBDIR=$SYSTEMC_HOME/lib-linuxaarch64" >> ~/.bashrc

verilator使用

verilator不是一个传统的仿真器而是一个编译器,用于将verilog和systemverilog等硬件描述语言转换为C++或SystemC模型,编译后可执行。
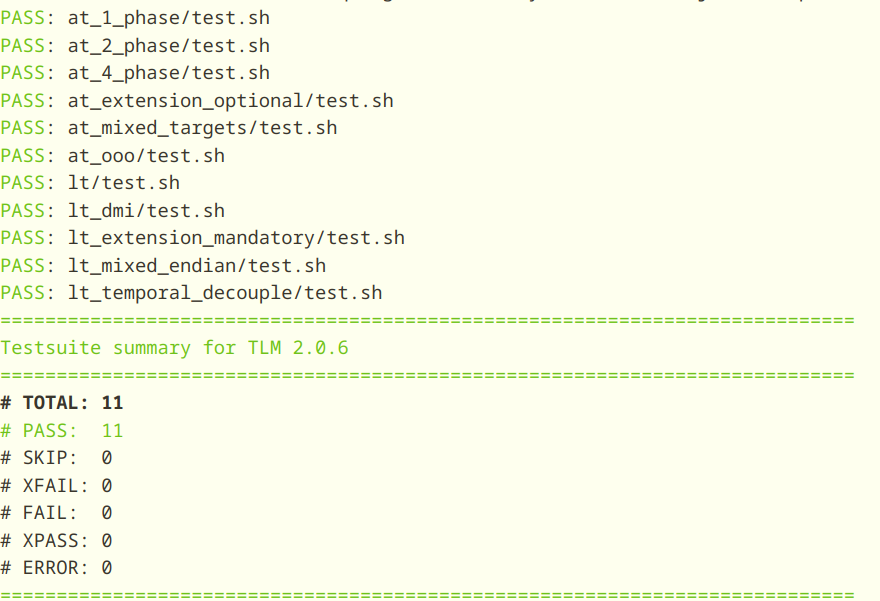
verilator给的案例中,有一个是Example C++ Execution,

1
2
3
4
5
6
7
8
9
10
11
12
13
14
15
16
17
18
19
20
21
22
23
24
mkdir test_our
cd test_our
cat >our.v <<'EOF'
module our;
initial begin
$display("Hello World");
$finish;
end
endmodule
EOF

cat >sim_main.cpp <<'EOF'
#include "Vour.h"
#include "verilated.h"
int main(int argc, char** argv) {
VerilatedContext* contextp = new VerilatedContext;
contextp->commandArgs(argc, argv);
Vour* top = new Vour{contextp};
while (!contextp->gotFinish()) { top->eval(); }
delete top;
delete contextp;
return 0;
}
EOF

编译并运行

1
2
verilator --cc --exe --build -j 0 -Wall sim_main.cpp our.v
obj_dir/Vour

gtkwave安装

GTKWave是一个基于Unix/Win32/MacOSX的全特性的示波器,类似于学习物理或通信所用的物理示波器,可以支持FST、LXT、LXT2、VZT、GHW和标准verilog VCD/EVCD等格式,主要用于挑食Verilog和VHDL仿真模型,它是通过分析采集后的dumpfiles文件进行分析,而不是实时交互式的那种示波器,支持模拟数据或数字数据,支持各种搜索操作,可从信号波形中提取感兴趣的,也可以通过PostScript和FrameMaker格式生成输出。

这个组件的安装就很随意了,直接使用apt进行安装

1
sudo apt install gtkwave

gtkwave使用

我们直接按照它提供的案例进行说明。
example代码下载到本地
这个例子是des加密即des.v, 我的当前系统并没有安装iverilog软件,咱们这里仅是将现有的des.fst转换为vcd

1
$ fst2vcd des.fst > des.vcd

我们会发现这个以.vcd为结尾的文件比.fst文件大很多,推荐使用.fst文件,后面会说如何将.vcd文件自动转化为.fst文件。
.vcd vs .fst

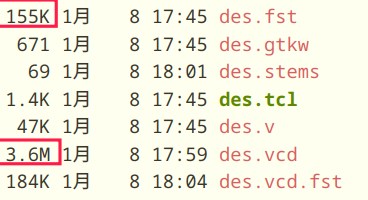
下一步,我们通过verilator生成一个stems文件

1
2
verilator -Wno-fatal --no-timing des.v -xml-only
xml2stems obj_dir/Vdes.xml des.stems

当源文件布局或体系变更需要重新生成stems文件。

1
2
3
4
5
6
7
8
//  -o, --optimize             optimize VCD to FST 对vcd文件进行自动优化为fst
// -t, --stems=FILE specify stems file for source code annotation 为源代码注解指定stems文件
$ gtkwave -o -t des.stems des.vcd des.gtkw
GTKWave Analyzer v3.3.118 (w)1999-2023 BSI
FSTLOAD | Processing 1432 facs.
FSTLOAD | Built 1287 signals and 145 aliases.
FSTLOAD | Building facility hierarchy tree.
FSTLOAD | Sorting facility hierarchy tree.

cmake安装

下载链接进行下载最新版本的cmake源码,当前版本是3.31.3

1
2
3
4
5
tar -xzvf cmake-3.31.3.tar.gz
cd cmake-3.31.3
./configure
make -j8
sudo make install

并输出cmake版本

1
cmake --version

cmake version

作者

KermitLiu

发布于

2025-01-08

更新于

2025-01-14

许可协议

You need to set install_url to use ShareThis. Please set it in _config.yml.
You forgot to set the business or currency_code for Paypal. Please set it in _config.yml.

评论

You need to set client_id and slot_id to show this AD unit. Please set it in _config.yml.
Your browser is out-of-date!

Update your browser to view this website correctly.&npsb;Update my browser now

×